Pacific Time — when you're on the go
 Pacific Time is a time and expense app for employees who need to track their time and expenses on the go.
Altogether, there are at least six ways Pacific Time can be used:
- Project and task time tracking
- Payroll time and attendance tracking
- Leave management including leave requests
- Expense reports
- Asset tracking
- Activity and log tracking
Getting Started
Download and install Pacific Time from the AppStore for IOS devices, or from Google Play for Android devices.
Download & install Pacific Time apps
This article will show you how to use the Pacific Time app.
Using Your Pacific Timesheet User Account
Open Pacific Time. As a Pacific Timesheet user, you already have a login and password. If you are a new employee and need a user account, contact your Pacific Timesheet system administrator or supervisor for that information.
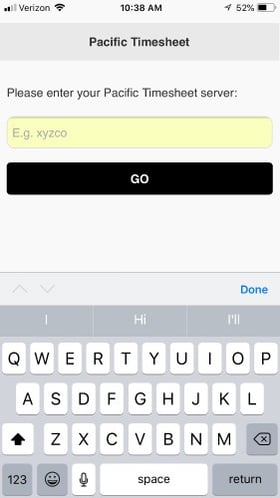
Connecting with Pacific Timesheet Server
The first time you use Pacific Time, you'll be asked to enter your Pacific Timesheet server.
Finding Company Server Name
As a Pacific Timesheet user, you already have a system URL, which looks something like:
https://mycompany.pacifictimesheet.com
Your server name is the mycompany part of the URL that falls between https://
...and
.pacifictimesheet.com.
Or, put another way:
https://mycompany.pacifictimesheet.com
Trial Users
If you don't have a Pacific Timesheet user account, start a free trial to get a user account as part of your Pacific Timesheet evaluation. Special instructions for free trial users.
Logging In
Enter your Company Server name and tap GO.
Then, enter your login name and password, and you're in.
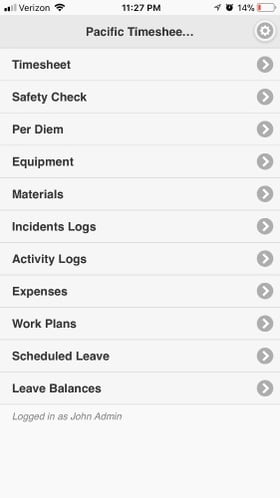
Using the App
Once logged in, on the main screen, you can do anything you need with one or two taps. You can start by using the Timesheet.Timesheet
Tap Timesheet to show your main timesheet page. Note that your Timesheet opens with today's Day and Date in red.
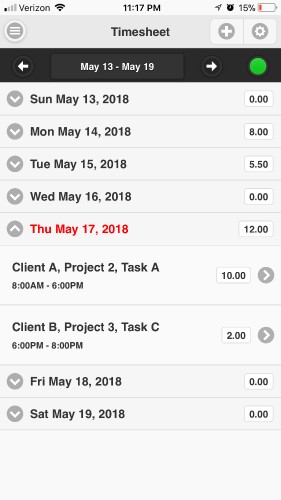
Add Work Entries
You can tap the plus button on the upper right to add a work, or leave, time entry.
For example, when you add a Work Entry you will be taken to a work entry details screen that looks like this:
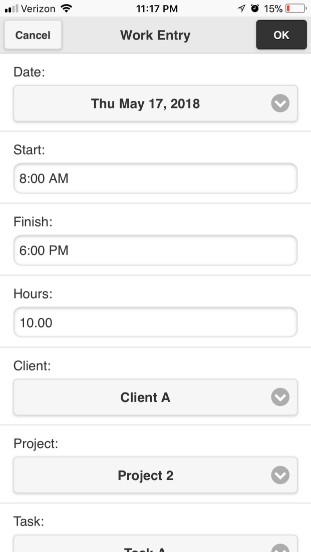
You can edit the time entry's details, like total hours, and select work items like projects and tasks, and even add detailed notes.
Selecting Projects
To select projects, tasks or other work items, tap on the item, like "Project."
Then you can tap and choose an item in the recently used items list.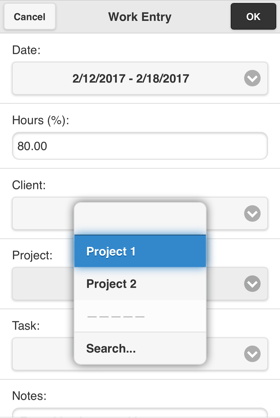
Search for Project Names
Or, you can also search for new Project or work item.
Tap on search and then tap in the search box.
Start typing the name of the item you need, and the app will show a filtered list of choices as you type.
.jpg?width=280&name=work-item-search%20(1).jpg)
Use Device Microphone
Or instead of typing, you can tap the microphone on your keypad and start speaking the name of what you’re looking for right into the search box. Tap the item you want, finish the details of your entry until you’re done.
Then, tap "Okay,” and you're back on the main Timesheet page.
Week View / Day View
Tap the gear icon, in the upper right, to toggle back and forth between the "Week View" and "Day View" of your timesheet. Remember, the App never forgets your last view of your timesheet. You can also tap “Copy Previous Day” to copy yesterday’s entries to today. And, you can delete the current day's entries, by tapping Clear Day.
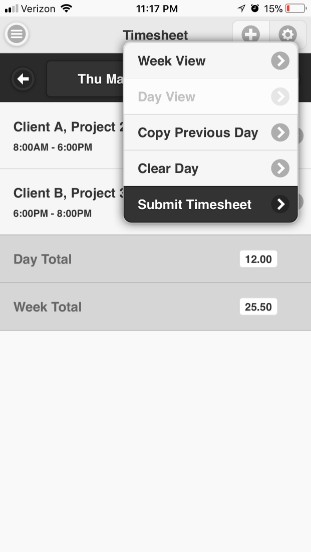
Submit Timesheet
When your entire timesheet is complete, just tap Submit Timesheet, locking down your timesheet, and making it ready for approval by your managers.
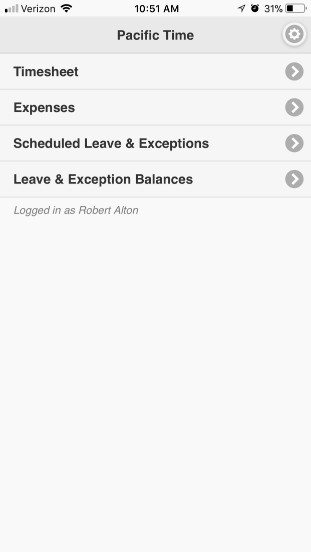
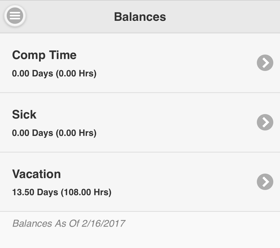
View Leave Balances
Pacific Time allows you to stay on top of your available leave balances.
From the main page, tap “Leave Balances” to check what leave you have today.
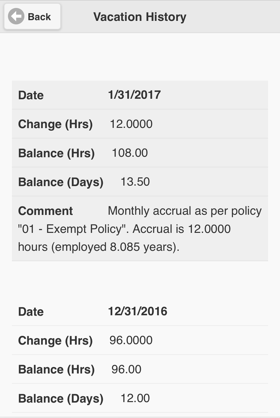
View Balance History
You can tap on Vacation, or any leave item, and see the complete history for all leave taken, leave accruals and your net leave balance over time.
Request Leave
Pacific Time also allows you to request leave.
From the main page, tap "Schedule Leave and Exceptions."
Then tap the Plus (+) button to create a new leave requests.
On the leave request form, tap the Type pick list and select the leave type you want to request.
Then pick the start and finish dates, maybe for that two-week vacation you want in August.
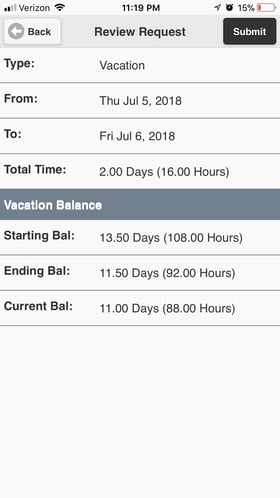
Leave Forecast
Notice above how the App shows you a forecast of your future leave balance on the starting date of your request. It does this by adding up future accruals and backing out already approved and scheduled leave. So, if you won’t have enough vacation in your balance, your request will not go through. If you have enough, the app will accept the request and route it to your managers for approval.
Leave Approval/Rejection Notices
When your manager approves your leave request, you’ll receive an email notice, that might include an approval message from your manager.
Once approved, your requested leave will automatically be pushed onto your future timesheet. If your manager rejects the leave request, you will receive an email notice with their reason for the rejection.
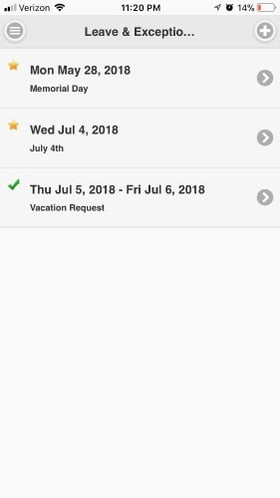
View Leave Schedule
You can tap Scheduled Leave and Exceptions anytime to view your upcoming leave schedule, including company holidays. The green dots mean the request is still pending, or unapproved. Once approved, the dots will become a green check mark. A rejected request will show up with a big red X. You can clear out reject requests by deleting them.
Expense Reports
Pacific Time and Expense also allows you to create expense reports with detailed expense entries.
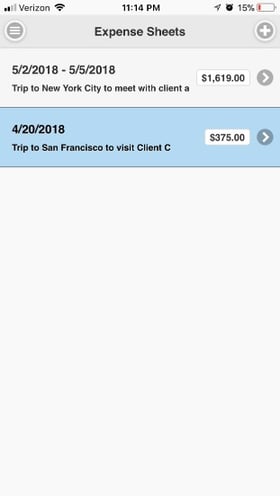
To create an Expense Sheet or Expense Report, on the main screen, tap Expenses.
Then on the Expense Sheets page, tap the Plus button to create a new Expense Sheet.
Expense Sheet Fields
When creating a new Expense Sheet, you need to complete required fields, including the expense sheet’s Description, start and finish dates, to save it to the App. Note that the App assigns a unique Expense Sheet ID when you create your new Expense Sheet.
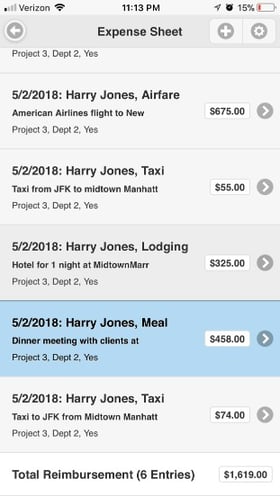
Create Expense Entries
On your new Expense Sheet page, tap the Plus button to create new expense entries. Then, set the expense date, select the expense type, enter a description, and select the expense currency. You can also code any expense entry by Client or Project.
You can also enter other details, like attendees at your meeting, payment method, or note if the expense was personal or business.
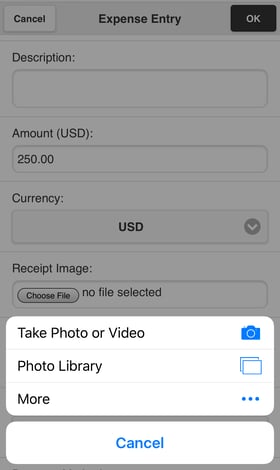
Attach Receipt Images
You can also attach the expense receipt image. Scroll down the page to receipt image, tap choose file, and a dialog will ask you to take a photo of your receipt, or to select an existing receipt photo in your photo library. Select the photo and attach it to the entry.
View Reimbursement Totals
After completing your Expense Sheet, you can view all its entries on the main Expense Sheet screen. Your expense entries will display in the local currency you selected for each entry, and your total reimbursement amount will be shown in your currency at the bottom of the sheet.
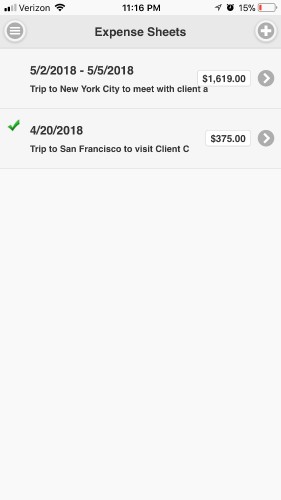
Expense Sheet Approvals
When you're done, submit your Expense Sheet for approval. Your approvers will receive an email notice that it’s ready for approval. When approved or rejected you will receive an email notice. A rejected Expense Sheet notice will include instructions on how to correct your Expense Sheet. Make the corrections and submit it for approval again.
Your Expense Sheets are always listed on the main Expense Sheets screen, so you can track their status. Submitted expense sheets have a locked icon. Approved expense sheets have a check mark. And Rejected Expense Sheets with a Red X. Open expense sheets will have no icon.
For detailed step-by-step instructions on using Pacific Time, use the Pacific Time Tutorial.