Pacific Timesheet has been used by hundreds of thousands of users for years on laptops and desktops. But Pacific Timesheet Mobile is becoming more important every day. According to Mobile Business Insights in 2016:
- 80% of email users are forecasted to check email by their mobile devices in 2018 (emailmonday).
- Average users check their mobile devices 46 times a day (App Annie).
- Half of all people pick up their smartphones when they wake up (ExpressPigeon).
Our customer research tells us that their users, particularly those in the field or traveling, are using Pacific Timesheet Mobile a majority of the time.
We thought it was high time for a definitive primer on Pacific Timesheet Mobile features:
 Mobile Timesheets
Mobile applications have required a complete re-thinking of interface design. This means flatter, simpler design, faster load times, fewer and more intuitive sets of interface options. Where there use to be three buttons, there is now one.
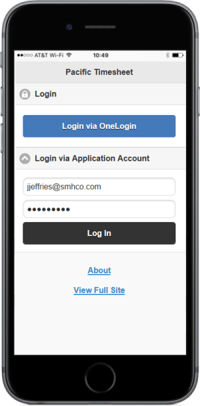
Accessing Pacific Timesheet Mobile is easy, with no need to download or update an app. Just open a browser on your mobile device (e.g. iPhone or Android) enter your system URL, and save it to your favorites for next time.
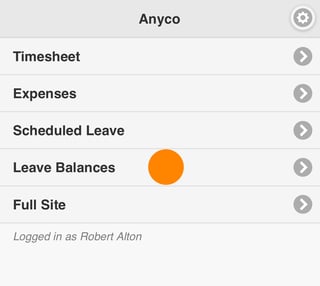
On the login page, enter your login name and password, and you're in. If you have single sign on, and you're already on your company network, just enter the URL and you'll end up on the main mobile dashboard shown below.
From here, you can reach anything you need with one or two taps.
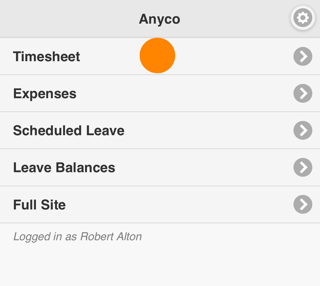
Tap Timesheet to show your main timesheet page:

Note that the application opens with today's Day/Date in red.
Tap the plus (+) button on the upper right to add a work or leave time entry.
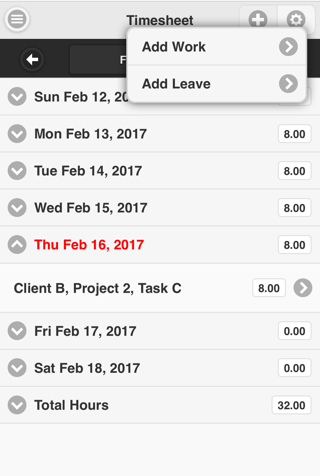

For example, when you add a Work Entry you will be taken to a work entry details screen that looks like this:
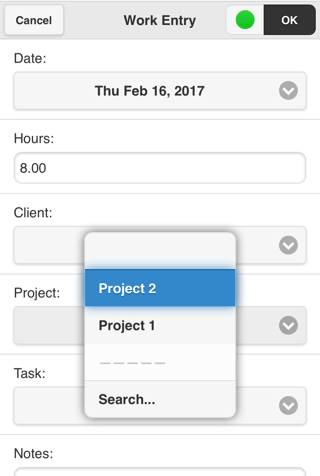
Edit the time entry's detials like total hours, select work items like projects and tasks, and add detailed notes. If you have an Attendance Timesheet, tap the green button to start a time entry timer.
You can search for projects, tasks or other work items by tapping on search and typing into the search box. A filtered list of work items will be returned as you type. To select, tap its name, and you will be returned to the time entry details page.
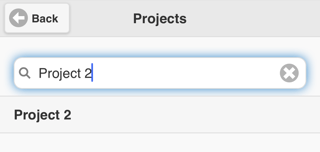
When your time entry is complete, tap "Okay" and you'll be returned to the Timesheet page.
Tap the gear icon in the upper right to move back and forth between the "Week View" and "Day View." As with the laptop/desktop application, the system remembers your last view of your timesheet. You can also Copy Previous Day entries or delete the current day's entries using Clear Day.
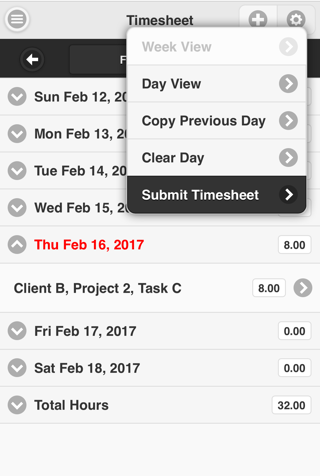
When your Timesheet is complete, just tap Submit Timesheet and tell your manager it's ready for approval.
Checking Mobile Leave Balances
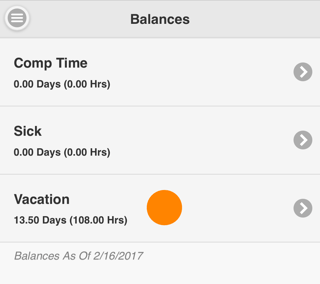
From the main page, tap Leave Balances to check what leave you have today.


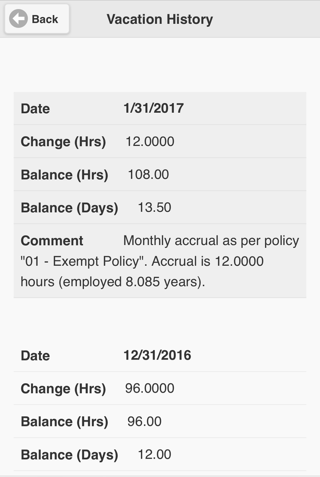
Mobile Leave Requests
Tap "Schedule Leave" to request leave . You're leave request form will look like this:
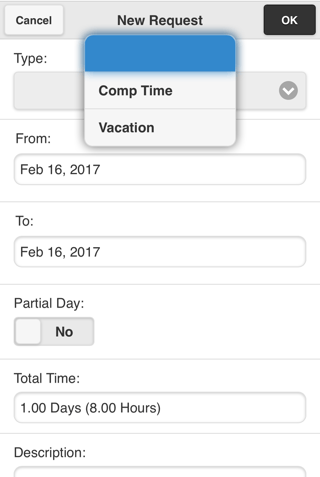
Tap the picklist to select the leave type you want to use for your request. Then pick the start and finish dates of your request. When you submit your request, the system will check your available future leave. If you don't have enough, you'll get an error message:
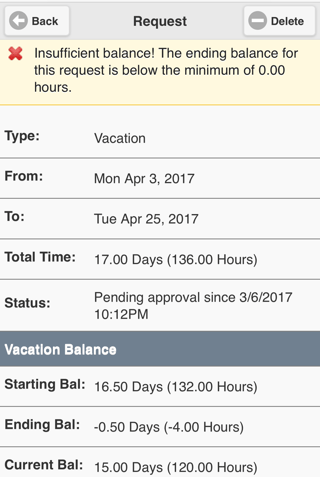
In this case, the form shows a forecast of your total future balance on the start date of the leave request. The system automatically calculates everything for you using this formula:
your current balance
PLUS
your future accruals
LESS
your future approved leave
EQUALS
your future starting balance
Leave Approvals & Rejections
When your manager approves your leave request, you will receive an email notice that might include an approval message from your manager. You can also tap Scheduled Leave to view your upcoming leave, including approved leave.
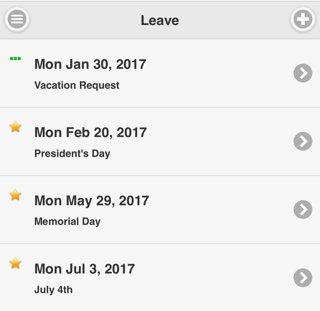
The green dots shows that a vacation request is still pending. Once approved, the dots will become a green check mark. A rejected request will show up with a red X.
Expense Reports and Mobile Expense Sheets
The create a Expense Sheet or report, tap Expenses and the (+) Plus button, which take you to an expense sheet page. For a new Expense Sheet, complete all the key fields, including the expense sheet Description, start and finish dates. The system will also generate a unique Expense Sheet ID.
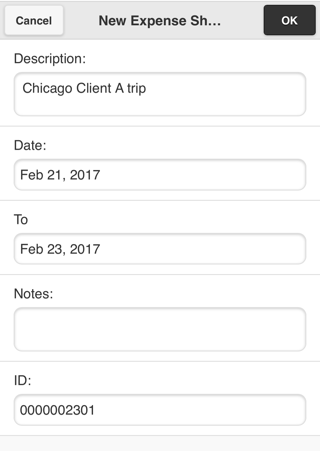
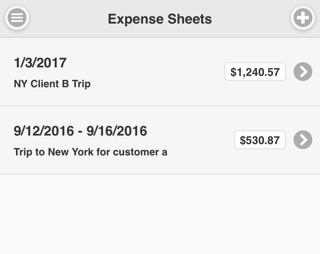
After you create expense sheets, your Expense Sheets page will start to list your expense reports.

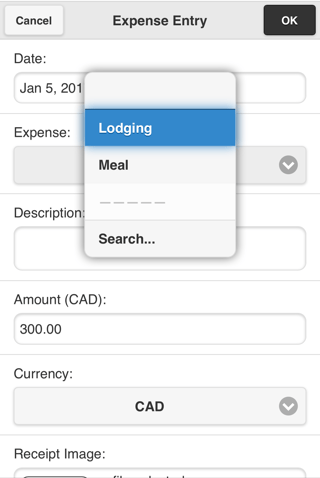
From the main page for your new Expense Sheet, tap the (+) Plus button to create expense entries. You can set the expense date, select the expense type, type a description and select the expense currency. You can also select and code any expense by Client or Project.

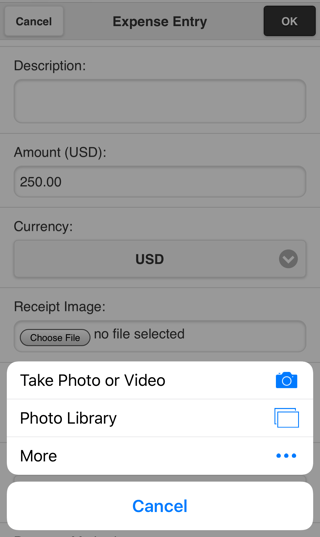
Scroll down the page to attach a receipt image.

After completing the Expense Sheet, you can view each entry and their details. Note that expense entries will display in the expense currency, and your total reimbursement amount will be shown in your reimbursement currency. When you're done, submit your Expense Sheet for approval. 
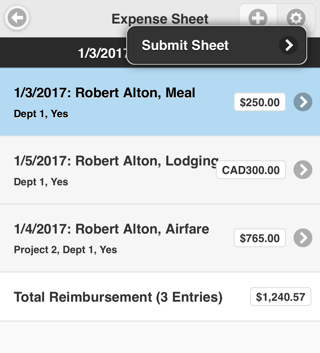
After submitting your Expense Sheet, your approver receives an automated email notice. When your approver rejects or approves your Expense Sheet, you will receive an email notice.
You can start and finish any expense report using a mobile device, laptop or desktop computer.

Pacific Timesheet Mobile is becoming more popular with users, and over time Pacific Timesheet will continue to add mobile features. Let us know what more you'd like to see in the comments section below or contact your customer relationship manager or Pacific Timesheet Support.


